

How To Get A Smooth Finish When Painting Kitchen Cabinets
Matt is a professional painter and freelance writer, sharing his knowledge, house-painting tips, and product reviews.

Don't Make These Mistakes When Painting Wood Cabinets
When done right, DIY cabinet painting is a cheap way to redo your kitchen and increase the value of your home. Kitchen cabinet painting is a process that takes a lot of patience and attention to detail.
Most homeowners hire a professional painter to paint their cabinets, but if you want to save money doing it yourself, don't make these common mistakes that can turn your project into a nightmare and prolong the time it takes to finish.
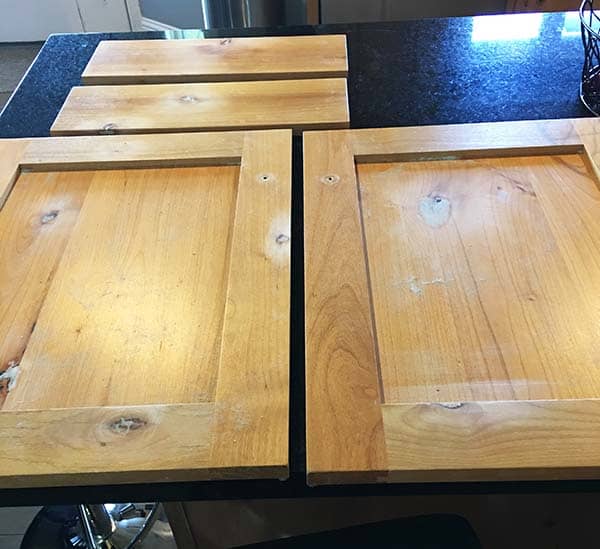
1. Not Removing the Doors and Drawers
Painting kitchen cabinets without removing the doors from the frames is difficult and much more time consuming. You'd have to carefully cut-in around the door hinges with your paint brush, and if you're spraying, all of the hinges will have to be covered with tape.
Simply remove your cabinet doors hinges and hardware with a drill. Lift the drawers out of the slider tracks too. Store the screws in plastic bags so they don't get lost. Set up a separate work space where you can spray or roll the doors on a flat surface.
2. Not Labeling Doors and Drawers
Numbering and organizing the doors upon removal is very important. Without labeling the doors, you'll spend a lot of time trying to figure out where each door goes. What I do is count the doors from left to right, starting with the upper cabinets. I write the number inside of the hinge hole for each door and tape over it.
For island cabinets, I write the letter "I" next to the number. Unscrew each wood drawer front and mark a number on the back side. Write the same number on the bottom of each drawer too as you remove them.
3. Not Installing Handles or Knobs
Disregard this one if your cabinet doors already have hardware, but if they don't, you should definitely install knobs or handles before painting them. Constantly opening and closing doors without knobs marks up the paint really fast, especially white paint.
The time to measure and drill holes for new hardware is before they're painted. Drilling holes through the paint can cause splinters and ruin the finish, and if you miscalculate and need to fill holes, you can do that early on before primer. Use a template from a home improvement store to easily pencil mark your doors for hole drilling.
4. Not Cleaning the Doors and Frames
Cleaning your cabinets before priming and painting them is one of the most important steps you shouldn't ignore. Even if your cabinets are newer and look clean to the naked eye, they're probably not, and painting over grease won't end well for you.
Cabinet doors become oily over time from cooking and boiling food. Small food particles, coffee machine exhaust, or even residue from a household cleaner, can cause adhesion problems with primer and paint.
Best Cleaners for Painting Prep
- TSP
- Simple Green
- Dawn dish soap
- Krud Kutter
Be sure to carefully rinse off the cabinets after scrubbing them with a cleaning agent. Not thoroughly rinsing the doors and frames after using cleaner can cause your paint to fish-eye from the residue left on the surface.
5. Not Sanding or Using a Sander
The label on your can of primer might say "no sanding is necessary," but you should always sand. The first sanding removes the lacquer finish on your cabinets, dulling them so the primer grips the surface better.
Always sand between coats to get a smooth finish. The first coat of primer usually dries rough to the touch, but scuff sanding in between makes the following coats nice and smooth.
Best Sandpaper for Cabinets
- Maple/cherry (before primer): 180-grit to 220-grit
- Oak (before primer): 150-grit to 180-grit
- In between coats of primer and paint: 220-grit to 320-grit
Sanding your cabinets with really rough sandpaper is a no no. Cherry and maple, for example, are both easy to damage beyond repair from aggressive sanding.
With the first sanding, all you need to do is dull the surface, that's it. Cabinets with a thicker lacquer coating on them will require a coarser grit of sandpaper, but always start with the finer grit first to see what it does.
Another mistake related to this step is attempting to do all of the sanding by hand. I highly recommend using an electric finishing sander to sand your cabinets. I use the Makita orbital sander on the frames and door panels.
6. Not Containing Sanding Dust
Sanding wood cabinets produces a lot of dust. You can and should sand the doors outside, but you'll still have to sand the frames indoors, and that's when setting up a plastic dust barrier is a must.
I use Zip Wall dust barrier poles to erect plastic walls when I paint cabinets. I own 12 Zip Wall poles and they are, by far, one of my favorite tools for dust and over-spray protection. The poles are sturdy and keep the plastic up without having to stick tape to the ceiling.
7. Not Removing Sanding Dust
Dust will contaminate and ruin the paint finish on your cabinets without cleaning the surface before each coat. Dust and debris gets stuck in the paint and becomes very noticeable when the cabinets are viewed under light at an angle.
Before applying each coat of primer and paint, wipe the surface with a tack cloth. You can also use forced air from an air compressor or a shop vac to blow the dust off of the substrate.
8. Not Using Grain Filler
Disregard this for cabinets made of maple or cherry. Grain filler works well when preparing oak cabinets for paint. With filler, you can minimize wood grain so your cabinets look a lot smoother and less like painted oak. It's an extra step that takes more time, but definitely worth the effort.
A good product for filling the grain in oak cabinets is Aqua Coat. I've used this product many times with good results. It's a clear gel that goes on light and easy, but dries very hard. Sanding this stuff is easy as long as you don't put the filler on in heavy layers.
9. Remodeling Your Kitchen After Painting
Replace your countertops before painting, not after. Painted base cabinets can get damaged when the installer removes the old counter and installs the new one. The same thing goes for backsplash tile between the cabinets.
Floor refinishing and new appliance installs should definitely be done before paint too. Protective materials can be used to cover your new counter and floor while painting.
10. Painting Cabinets Without Primer
You've spent hours or even days cleaning and sanding your cabinets, so they're ready for paint, right? Nope. One of the biggest mistakes you can make is painting right over the wood without priming first.
Most interior paint alone won't stick to bare wood too well without a prime coat underneath for adhesion. The primer serves as a surface sealer and bond coat. If you want your painted cabinets to look as good as those pictures you saw on Pinterest, you absolutely must prime first or the paint will rub off and yellow from wood tannin.
11. Using Latex Primer
Nothing leads to a cabinet painting disaster quicker than using latex primer. I have yet to find a latex primer suitable for unpainted wood cabinets. Latex primer and paint don't do anything to block bleed-through from wood tannin and oil-based stain.
For example, using latex primer on bare oak, or cherry, will lead to noticeable discoloration when painted. Without the right primer, that fresh coat of white over your cherry cabinets starts looking pink and blotchy as the paint dries. Don't make this common mistake that usually requires stripping off the primer and starting over.
Best Primer Sealer for Cabinets
- Zinsser Cover Stain (oil-based primer)
- Kilz Original (oil-based primer)
- Zinsser BIN Shellac Primer
The three products above have been around forever and work great for unpainted wood to prevent bleed-through issues. The primer I use on all of the cabinets I paint is BIN shellac primer. Sherwin Williams also sells their own version called White Pigmented Shellac Primer, which is basically the same as BIN.
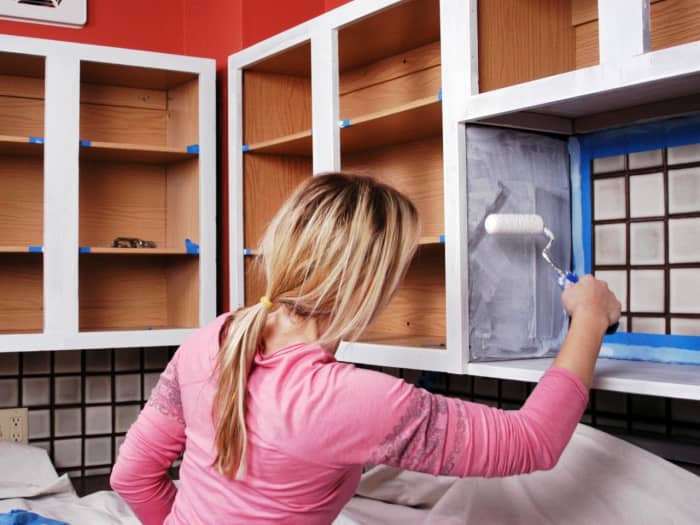
12. Not Preparing Your Kitchen for Paint
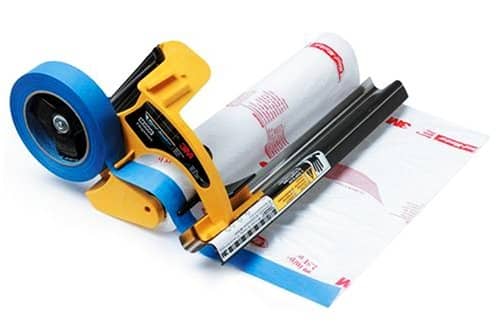
Cabinet painting is very messy work that can literally ruin your kitchen without protecting everything first with masking materials. If you're spraying your cabinets, take the time to carefully cover everything with plastic and paper.
When I prep a kitchen for spray painting, I use plastic sheeting and heavy duty floor paper. In particular, the X-Board paper is awesome for covering floors. The paper is thick and leak-proof. Cover the appliances and countertops with plastic. I would also consider making use of a hand masker to save time with your masking.
13. Not Spraying Your Cabinets
You can certainly make cabinets look nice, painting them with a brush and roller, but with a little practice, spraying produces a far superior finish. I also consider brushing and rolling cabinets to be a mistake if you have limited time for this project. Spraying the doors, instead of rolling them, will cut the work time in half.
You don't have to spend a ton of money on a sprayer, or even buy one at all. Paint stores rent professional sprayers. The two sprayers I use for my cabinet painting projects are the Titan 440 Impact and the Graco GX-19 Finish Pro, both airless sprayers. I definitely recommend at least spraying the doors instead of rolling them.
14. Putting the Paint on Too Heavy
Painting too heavy can lead to bubbles in the finish and extended dry time. Bubbles are your number one enemy here. Certain products, especially acrylic/alkyd enamel, form bubbles very easily when paint is applied beyond the wet mils specification recommended by the manufacturer. These bubbles pop as the paint dries, leaving craters all over the place. The only way to fix this is to wet sand everything and repaint.
I recommend buying and using an inexpensive wet mil gauge to measure the thickness of your coating so you can stay within the specs of the paint you're using and avoid a potential headache.
15. Not Letting the Paint Dry Enough
It's easy to get impatient and start painting the next coat as soon as the previous coat looks dry enough, but you could end up ruining the finish on your cabinets if the paint hasn't really dried yet.
Each coat of primer and paint needs to fully dry before re-coating. The label on the can provides the re-coat time, which you should always follow. A common re-coat time for acrylic paint is four hours, but some paints have much longer re-coat times.
Similar to painting too heavy, bubbles can form on the surface if paint's applied over a previous coat that hasn't dried yet. The cause of this is from off-gassing of the wet paint underneath. Another problem that can occur is the paint remaining sticky for a prolonged period of time.
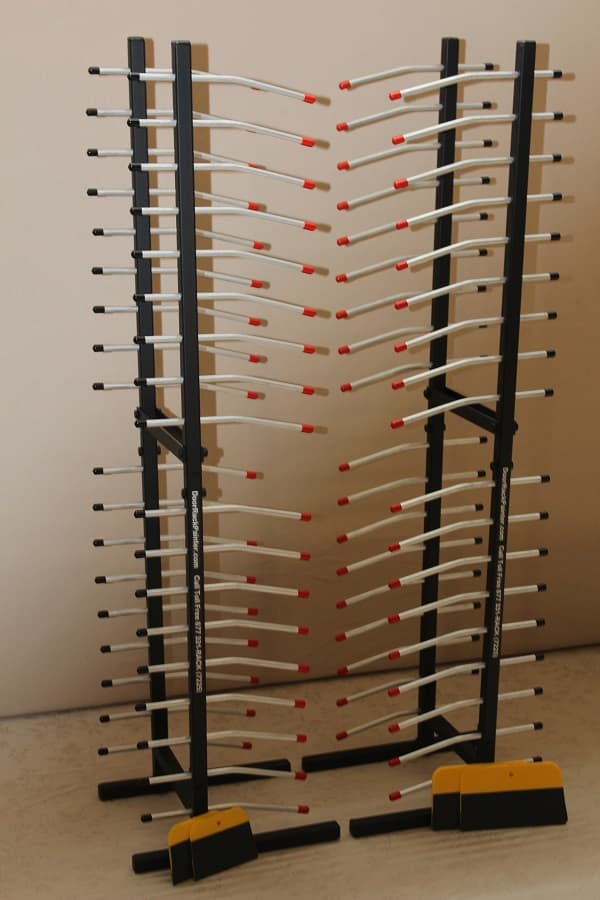
16. Not Using a Drying Rack
The way most people paint their cabinets is they'll paint one side of each door and turn them over the next day to paint the other side, but repeating this process for multiple doors and coats takes forever.
There are special racks for spraying and drying that give you the ability to paint both sides of cabinet doors without having to waste time waiting until the next day to paint the other side. You can finish your project several days sooner with a rack.
I own and use three of the Door Rack Painter racks for all of my cabinet painting projects. I'm able to finish my projects a lot faster using these racks.
17. Not Using a Rotating Spray Rack
Whether you buy one or build one yourself, a rotating spray rack is a must when spraying cabinet doors, even if you're brushing and rolling them instead of spraying. Painting dozens of cabinet doors with multiple coats of primer and paint is a lot of work, but so much easier with the right setup.
Standing up all day to paint doors is very tiring when repeated over and over. With a rack, or a work table that rotates, you can sit in one place and spin the door around to paint the door at different angles instead of having to physically walk around the door.
18. Not Installing Door Bumpers
You've spent weeks painting your kitchen cabinets, so don't forget to protect the paint with new door bumpers. Most cabinet doors already have door bumpers on them, but they usually fall off when you clean and sand the doors. Without door bumpers, the paint will chip over time from repeated contact with the frame when the door's closed.
Door bumpers also prevent fresh paint on the door and frame from sticking together. You can buy packs of door bumpers for cheap at most home improvement stores. Two bumpers per door and drawer is plenty. The clear plastic bumpers look best.
19. Repainting Cabinets With Peeling Paint
Painting over cabinets with peeling paint, even if you've sanded off the loose paint, is a mistake. There is a reason why the paint is peeling in the first place. The paint could be peeling because primer wasn't used or surface contaminants caused adhesion problems.
The best solution is to strip the paint from the doors and start over with a clean slate. Stripping paint isn't fun, but it's better to start over than paint over something that will likely be problematic anyway.
20. Using the Wrong Brush and Roller
I always recommend spraying cabinets, at least the doors, but if you've decided you're going to brush and roll them, using the right roller is important for getting a smooth finish. Using a roller that's too thick will leave heavy stippling texture on your doors and frames.
The best roller to use on cabinets is 4-inches in length with a 1/4-inch nap. The 1/4-inch nap produces a very smooth finish. I've used the Flock Foam rollers from Sherwin William and those produce a very smooth finish too. For paint brushes, choose a 2-inch to 2 1/2-inch brush with soft bristles to minimize visible brush marks.
This content is accurate and true to the best of the author's knowledge and is not meant to substitute for formal and individualized advice from a qualified professional.
Questions & Answers
Question: I am repainting cabinets and have areas were they were sanded to the wood. Is it possible to get a good finish or is this a total mess up?
Answer: It depends on the type of wood. Aggressive sanding can damage wood and change the texture. For example, you can ruin maple if you over sand it. If you only sanded down to the bare wood, it's probably fine. The right primer will seal the bare spots. You can also patch over the spots too if the sanding caused divots in the finish.
© 2020 Matt G.
How To Get A Smooth Finish When Painting Kitchen Cabinets
Source: https://dengarden.com/home-improvement/20-Mistakes-to-Avoid-When-Painting-Kitchen-Cabinets
Posted by: foltzabsetiley.blogspot.com
0 Response to "How To Get A Smooth Finish When Painting Kitchen Cabinets"
Post a Comment